 EZVIZ no longer supports Internet Explorer 10 or earlier versions, and the site may not behave as expected. Please upgrade to a newer browser.
1. Instal EZVIZ Studio di PC Windows Anda dan pastikan perangkat EZVIZ dan PC Anda berada di LAN yang sama.
2. Setelah instalasi, Anda harus masuk ke akun EZVIZ Anda terlebih dahulu.
3. Kemudian buka direktori root Ezviz Studio di PC Anda dan temukan folder bernama “config”.
4. Copy file bernama "AppConfig.ini" di folder "config" ke Desktop Anda. Kemudian buka "AppConfig.ini" di Desktop dan Anda akan melihat perintah berikut.
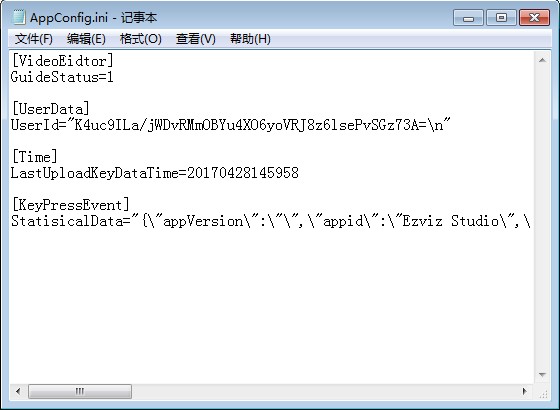
5. Tambahkan perintah berikut ke "AppConfig.ini" dan klik "Simpan" sebelum keluar:
[LocalOperation]
Show=1
6. Salin file "AppConfig.ini" dari Desktop Anda ke dalam folder “config” dan overlay yang lama.
7. Refresh halaman perangkat di Ezviz Studio atau buka kembali Studio, maka Anda akan melihat “Advanced”.
8. Jika Anda ingin menyembunyikan pengaturan “Advanced”, silakan ubah perintah “Show=1” menjadi “Show=0”, lalu buka kembali studio EZVIZ.


